Showing posts with label vegan cooking show. Show all posts

Monday, May 11, 2009

Love Springtime!

I just had to share a pic from the farmer's market this weekend. I love the abundance of fresh produce and flowers. So much eye-candy!

Talking about produce, my friend Nancie McDermott (cookbook author extraordinaire!) just started a blog and has a great post about growing lemongrass in a jar on your windowsill. I'm going to pick up some lemongrass later today and give it a shot.

Also, before I sign off, I wanted to mention that we just put up a video for Veggie Bao Buns on Everyday Dish (Member's Login). We'll be adding a delicious new video & recipe every week!


I'll be back tomorrow with a new cookbook review.

Have a great day!

Friday, May 8, 2009

Raw Corn Tortillas

Thank you so much for the amazing and enthusiastic response to the call for recipe testers. I wish that I could use everyone who replied. Although I only need a handful at the moment, I will most likely need more to come, so I'll be keeping everyone's name on file. Thank you again!

We just put a new video on Everyday Dish for raw corn tortillas (with chef Elaina Love). They are really good, so go check it out! We've had a lot of requests for raw recipes, so we turned to a couple of experts to share some of their favorites. There are more raw recipes to come.

Also, I want to thank everyone who has subscribed to the membership side of Everyday Dish. By subscribing you are helping us to keep Everyday Dish and the cooking show alive and thriving. We love you guys and want to say a giant thank you for your support!

Have an awesome weekend!

XO Julie

Thursday, May 7, 2009

A Call For Testers

I'm in need of a few good recipe testers for the new book. Right now I've got a handful of recipes that are almost ready to be tested, probably in the next week or so. This is just the first round, so if the timing doesn't work for you right now, not to worry. There will be other opportunities for testing to follow.

What I'm looking for in the testers: people who have the time to commit to cooking and testing recipes in the next couple of weeks, are experienced with cooking and baking (preferably with vegan recipes) and don't mind following the recipes to a T. Prior recipe testing experience is great, but not required. If you're interested in testing, just leave a comment here, and an email or a way for me to reach you.

Now, just in case you're wondering what the photos are of, the top one is a chocolate chip swirl bread and the bottom is a mocha java cake. Yup, both recipes are in the new book.

Thanks!!

Friday, May 1, 2009

It's Finally Up!


The membership area is finally up on Everyday Dish. Whew! I feel like a proud mama. Jay and I have been working feverishly on it since last winter, and are so excited to finally have it up and ready to share.

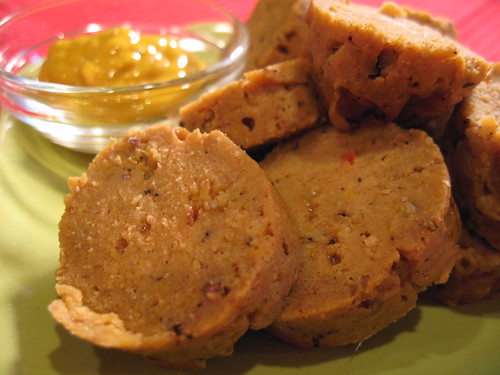
When you go to sign up, click on the "Member's Login" tab at the top of the page. Make sure to login first as a user on the site. Otherwise it might not let you register. The pictures above are from the new recipes (little smoky links and key lime cheesecake). Besides the pics above, and the marshmallows and chocolate cream pie, there's also chorizo sausages, chedda & nacho cheeses (that are soy-free and will knock your socks off!), curried coconut sausages, jambalaya... The list goes on and on.

I'd better get back to working on the cookbook.

Have a great weekend!

XO Julie

Wednesday, April 22, 2009

Fun News, Marshmallows And Chocolate Cream Pie

A while back I mentioned that I was working on a couple of new projects. You already know about the book, so here's the scoop on the other one. For the past few months we have been working feverishly on launching a Membership side to Everyday Dish TV. We're putting the finishing touches on and it should be polished and ready for its big debut within the week.

Becoming a Member will include exclusive access to over 45 new cooking videos and recipes! We cover helpful tips like stocking your vegan pantry to recipes for vegan marshmallows, chorizo sausage links, my rockin' nacho and chedda cheeses and everything in between. New videos will be added monthly for fresh ideas and innovative recipes. The first 20 subscribers to the Membership side will also receive one of our Everyday Dish DVD's free for joining. So definitely stay tuned because you won't want to miss out. You'll love what you're going to see. The recipes on the membership side are some of my very best.

The picture above is a chocolate cream pie with marshmallow meringue topping. Yes, it's true! The recipe is perfected, filmed and ready to share with our members. I'll let you know once we've officially launched.

I have to admit, I'm so thrilled to be able to share the marshmallow and meringue recipes finally! I think I worked on those recipes for almost 8 months, with hundreds of trials and trails of marshmallows along the way. Whew, that was a lot of work. But I knew that it was a code that I had to crack ; )

Thursday, April 9, 2009

Nanaimo Bars And Sarah Kramer


Aren't these Nanaimo bars gorgeous?! They are are every bit as delicious as they look. The recipe is from Sarah Kramer (from her new book Vegan A Go Go), and I'm so excited that she shared it with Everyday Dish. Go check out the video (and recipe) now! You are going to love these bars!

I first had Nanaimo bars in 10th grade when I was living in Vancouver, B.C. My mom was participating in a Fulbright Exchange, and my brother and I were thrilled to go along for the ride. That incredible year in Vancouver was where I first fell in love with Nanaimo bars, the Pacific North West and tea (more about that in another post). I was sad when the year was over, although we went home with lots of memories, photos and a plethora of recipes that I had collected, including several for Nanaimo Bars. Yes, I know that I was only 16, but I was food and recipe obsessed from a very young age; ) Unfortunately none of the recipes were vegan so I am thrilled that Sarah has done the work for us.

Now, go check out that video!


Monday, March 2, 2009

Chocolate & Donuts

I've been cooking and baking up a storm, working on all sorts of recipes for both the new book and Everyday Dish. The recipe above is for Chocolate Creamboats, and the gorgeous photo was taken by my very talented friend Kim. Couldn't you just reach into the picture? This recipe is going to be in the new book.

Yesterday I found myself working on donut recipes for the book, which is turning out to be a lot trickier than I expected. This may be why I don't often see yeasted vegan donuts. I'm determined to come up with a light and tender version though, and won't give up until I do. Did I mention that my whole house smells like a donut shop?

Wednesday, September 24, 2008

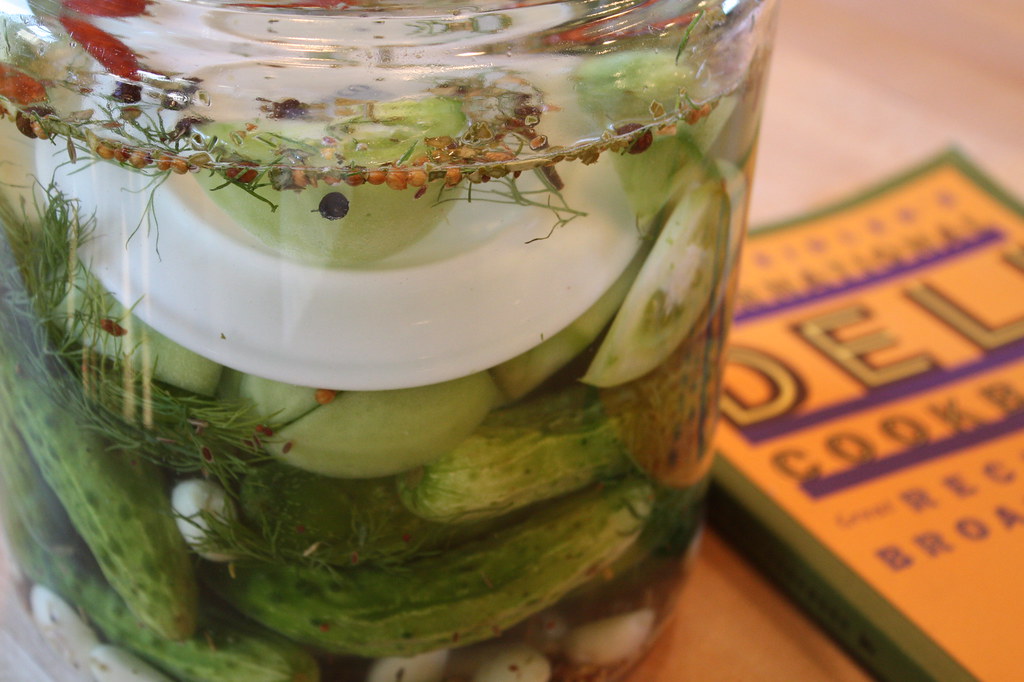
Homemade Kosher-Style Dill Pickles

As you can probably tell by now, I love making food from scratch. It's usually fairly easy to prepare, can be customized to your palate and tastes, and is better than anything you could buy at a store. I like to think of homemade food as the ultimate in Artisan craft.

So what's my latest project you ask? Pickles. My love of pickles goes way back to childhood, to the awesome bowls of sour dills that would grace the table at our local deli. I loved the crunch of these freshly pickled cukes, the salty yet lightly sour taste. These pickles bared no resemblance to the softer, vinegar-flavored pickles found in grocery stores. These were the real deal, true deli-style salt-brined Kosher dill pickles. It took me a long time to find a recipe that fit this bill. I am happy to say though that it was not in vain.

In the early 1990's a modern, hip-style deli opened in Santa Monica, California. The concept of the Broadway Deli was Jewish deli meets hip eatery. They had lots of inspired dishes on their menu, artisan breads and great desserts. In 1994, they came out with a cookbook, and right there in it's pages was the recipe that I had been searching for: true, salt-brined Kosher dills.

I don't think that the cookbook is any longer in print, so I'm going to post the recipe here. Feel free to add green tomatoes, lots of extra garlic and even dried or fresh chili peppers. I hope that you enjoy them as much as I do. They're really quick and easy to make, and can be stored in your fridge for quite a while. Plus, you should be able to find pickling cukes at your local farmer's market right now. If you have lots of green tomatoes on your tomato vines, which won't have a chance to ripen before the cooler Fall weather rolls in, this is a perfect thing to do with them.

Broadway Deli's Quick Dill Pickles
(makes 10 to 12 pickles)

These pickles taste just like the one's grandma used to make, only they're faster and easier to prepare. To transform bumpy little cucumbers into crisp, garlicky dill pickles, place all of the ingredients in a jar, cover, and shake. In four days you'll have the best dill pickles you've ever tasted.

4 quarts boiling water, for cleansing jar
3 tablespoons pickling spices
6 cloves garlic
10 to 12 firm, small pickling cucumbers (about 1 1/2 pounds)
1/4 cup Kosher salt (preferably Morton's brand, which is saltier than others)
1 bunch fresh dill

1. Pour boiling water into a 1-gallon canning jar and pour out. Drop pickling spices and 3 of the garlic cloves into the bottom of the jar. Arrange cucumbers in the jar to fill just up to the neck. Top with salt, remaining 3 garlic cloves, and dill. Add cold water to cover. Cover securely with the lid. Shake well and let stand for 3 to 4 days in a cool, dark place before serving.
2. Refrigerate after 4 days to stop the pickling process. The pickles will keep for several weeks, covered, in the refrigerator.

Variation: Replace cucumbers with green tomatoes.

Recipe adapted from Judy Zeidler's International Deli Cookbook; Great Recipes From The Broadway Deli, by Judy Zeidler, Chronicle Books, 1994

P.S. If you're wondering why there is a plate in my pickle jar (in the photo), it's because I doubled the recipe and topped the cukes with a plate. This helps to keep the pickles submerged in the brine.

Thursday, September 4, 2008

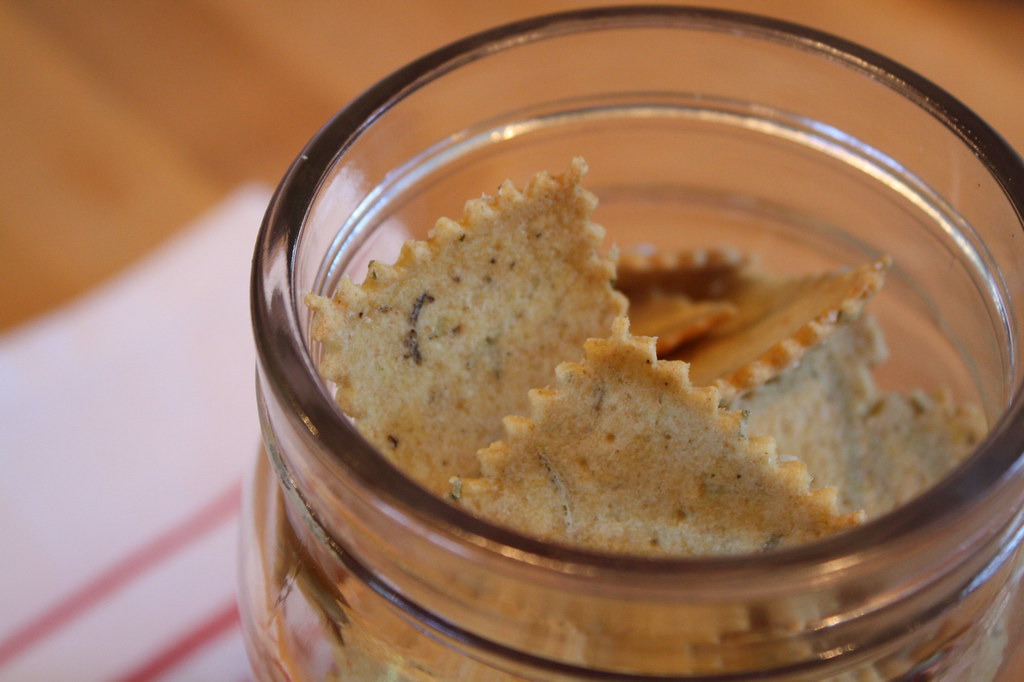
Crackers

I have a new favorite obsession. Homemade crackers. It really started just the other day. My kids were asking me to buy them snacky food that they could take in their school lunches. I just couldn't do it. One, because I get tired of all the junky ingredients in a lot of those snacks. The other reason is that I have a ton of whole grain flours that are screaming to be used (and hey, I could save money at the same time). So rather than head out to the store, I headed to the kitchen and started making crackers.

The crackers are so incredibly easy to make, almost easier than making cookies. They also contain healthy ingredients, most of which we all have sitting in our pantries. And the best part? My kids absolutely loved them! They polished them off and asked for more. Being the sneaky mom that I am, I said I would show them how to make them. That way, when the craving hits, they might actually try and bake themselves up a batch. Well, you never know.

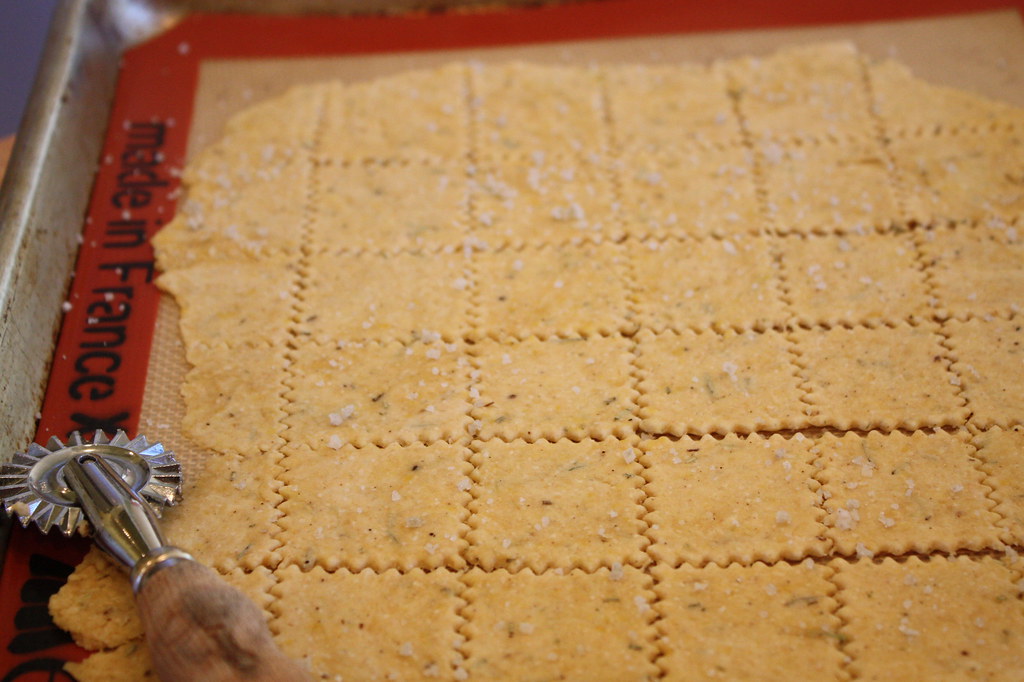
Feel free to play around with the flours or seasonings. I did find that my kids preferred the crackers when I used half all-purpose flour and half white whole wheat. I also discovered that they not only baked better on a Silpat (silicone pan liner), but they practically flew off the baking sheet. If you have one of those nifty pastry wheeler/cutter, it works really well for gently cutting the crackers into squares. Otherwise you can just roll the dough out thinly in the pan, bake, and then break into pieces when cool.

Here's the recipe for those of you who would like to try your hand at homemade crackers. I promise you it's painless and fun! It's also a perfect project to do with young kids or on a rainy day. Once you go homemade you'll never go back.

Julie's Rosemary Garlic Crackers
1 cup all-purpose flour
1 cup white whole wheat or whole wheat pastry flour
2 tbsp nutritional yeast
1 tsp baking powder
2 tsp dried rosemary
1 tsp granulated garlic
3/4 tsp fine sea salt
1/4 tsp ground pepper, optional (but good!)
1/2 cup water
3 tbsp extra virgin olive oil
Coarse sea salt crystals, optional

1. Preheat oven to 400°F.
2. In a bowl, mix together the flours, nutritional yeast flakes, baking powder, rosemary, garlic, salt and pepper. Add the water and oil, stirring until dough comes together. If dough is too dry to mix, add another tablespoon of water or as needed. Divide dough in half.
3. Roll the dough out very thin. If you have a small little rolling pin, simply roll the dough right out in your pan. Transfer the dough to a Silpat or parchment-lined baking sheet. Score the dough into squares so that it's cut, but not separated into pieces. If desired, sprinkle a little coarse salt over the tops of the crackers and lightly press into dough with the rolling pin. Repeat with second piece of dough.
4. Bake crackers in preheated oven for 15 minutes, or until golden and crackers look crisp. Let crackers cool in pan before removing. They will crisp up as they cool. If crackers are still a little soft, place bake in oven and bake for another five or so minutes until crisp.

Copyright © 2008 Julie Hasson


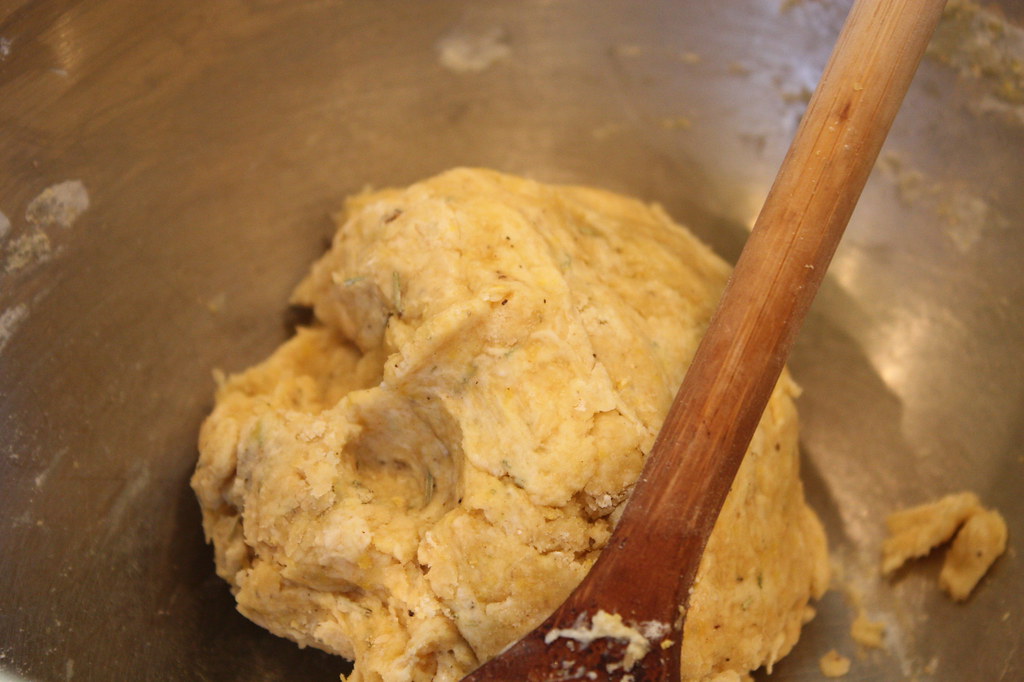
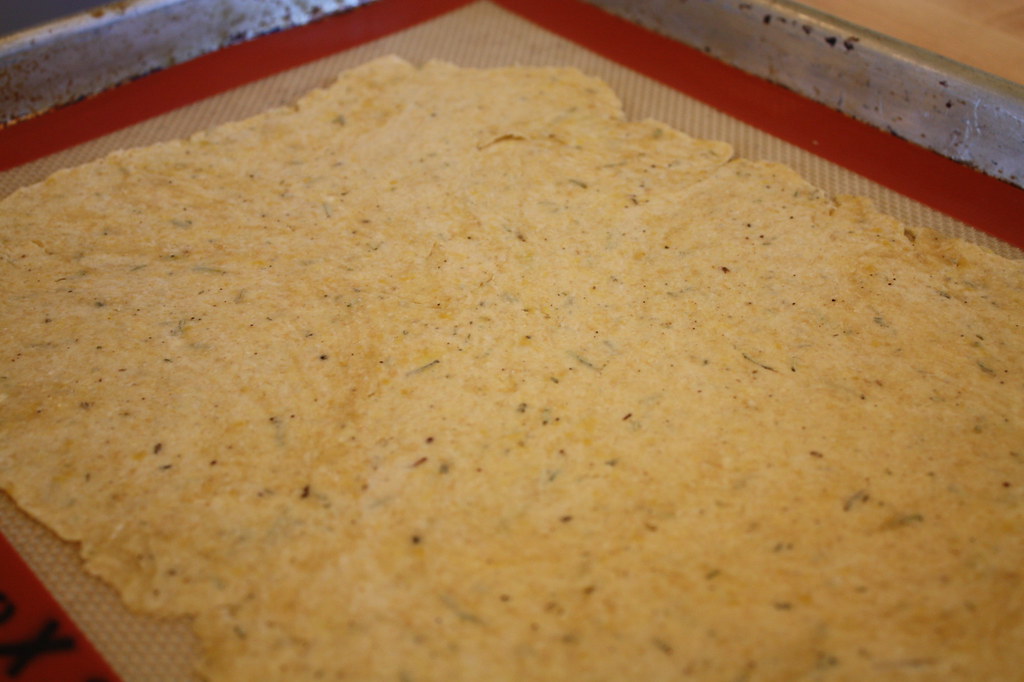
Here's some pics of the cracker-making process.

Dough

Rolled dough in pan

Scored/cut cracker dough, ready for baking
(with the pastry wheel/cutter)

Baked and cooled crackers. You can kind of sea the little salt crystals on the tops.

Thursday, August 28, 2008

Blackberry Soda

There is nothing like the fresh flavor of homemade soda! We usually have a pretty big stash of frozen berries, and the berry syrup to make this soda is easy-peasy - just the ticket on a hot summer day. You could also use the syrup for pancakes, waffles or homemade snow cones. The recipe and video are up on Everyday Dish. Feel free to substitute another berry for the blackberries, depending on what you have.

If you're into bubbly water or homemade soda, check out this toy. I love it, love that you can reuse the bottles so they don't wind up in landfills, and that it works out to 18 cents a liter. Not bad, and so much fun!

Anyways, check out the recipe for a fun and delicious treat.

Tuesday, January 22, 2008

I'm In Love

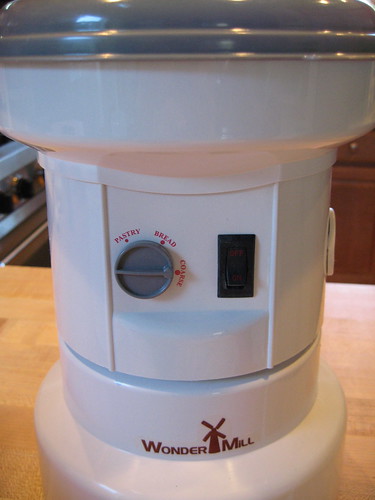
What can I say, but that I'm totally in love... No, I'm not referring to my husband (although I love him madly too), but my Wonder Mill. I know, this sounds absolutely ridiculous, but I assure you it's not. I've finally had some time to play with the mill, and it's really amazing. First off, not only does it grind flour out of grain, but beans and legumes too. We're talking flour as fluffy as freshly fallen snow.


What really inspired me to play with the machine was a recent trip to Bob's Red Mill. I discovered organic soft white wheat kernels, which I was told could be ground into pastry flour. I was so excited, because you can't buy white wheat pastry flour in stores. Completely intrigued, I proceeded to buy myself a 25 pound bag. I know that sounds like a lot, but I go through a lot of flour with all of the baking I do and I'd been wanting to do more exclusively whole grain baking. This seemed like a great start. Oh, and guess how much that organic 25 pound bag was? It was something like $11.00. Sold!

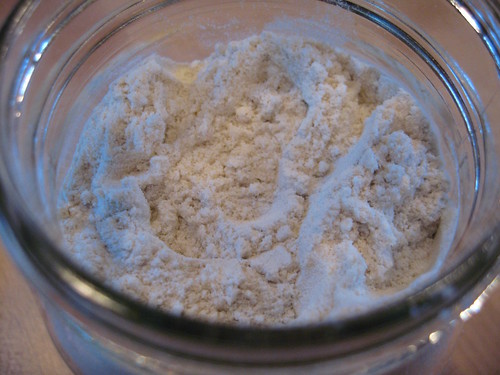
So I pulled out the grain mill and flipped that baby on. First up, white wheat pastry flour. The result? The MOST amazing flour I have ever baked with. Soft and fluffy, this was the perfect pastry flour. Intrigued, I tried regular white wheat flour. Result? Amazing. Now I was ready to really mix things up. I pulled out red lentils. I mean, how cool would red lentil flour be. Result? A beautiful pink flour that I'm dying to play with. Imagine the possibilities. Next up? Brown rice flour. I was having so much fun producing silky, fresh, beautiful flour. I also made black bean flour and chickpea flour. I love that the machine grinds the flour super fast. I quickly cleaned out the mill and put it back in the cabinet. No muss, no fuss (or so to speak).

White Wheat Pastry Flour

White Wheat Flour

Red Lentil Flour

Armed with the white wheat pastry flour, I started baking. I decided to try subbing the flour measure for measure with all purpose flour in several recipes. The results were outstanding. I made delicious pancakes, awesome blondies (from the book My Sweet Vegan) and a decadent chocolate cake. I also tried my hand at 100% whole wheat bread, using my regular white wheat flour. I used a recipe that has been making it's way around the blog world, and it is a great loaf of bread. Light, fluffy and 100% whole grain.

Whew! Fortunately I still have some energy left to start painting the kitchen. We got a bit of a late start on it, but it's now ready to go. I will post before and after pics when we're done. Here's a picture of the beautiful new cabinets that Jay built. I can't wait to see how it's all going to come together. I'm hoping that we can get it finished in a week and a half.

Thursday, January 10, 2008

Sausages!!


We finally did it. The vegan sausage recipe is up on everyday dish (click here for the recipe & video). Oh yeah! I hope that everyone gives it a try.

What I love about this recipe is that you can make so many variations of it. By changing the flavors around, I made a nice spicy chorizo, mild Italian and apple sage sausages. I also found that if you don't want to roll the sausages, you can shape them into small little breakfast patties and steam them that way (they look like Morningstar patties). I even made little tiny sausage links. They are just too much fun!

A quick tip for you too. Although the sausages are good right after steaming, they are so much better after being refrigerated overnight. They also freeze well too.

Now, just to mix things up a bit, we're proposing a challenge for you. We'd love to hear what flavor combos you come up with using our basic sausage recipe. You can email me pictures, recipes, videos, whatever you like. You might even find your sausage recipe, video or pics up on our site. Come on, you know you like a good challenge!!

My one suggestion would be for you try our recipe as written the first time and then go to town. That way you'll get a good idea of what our sausages are all about.

Here's a few pics of the process. They are so easy to make!

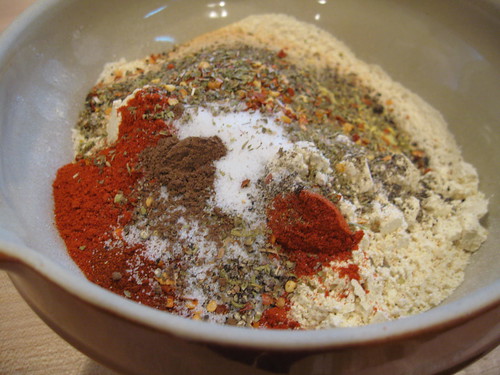
All of the spices (and yes, there are lots!), along with the vital wheat gluten and other dry ingredients.

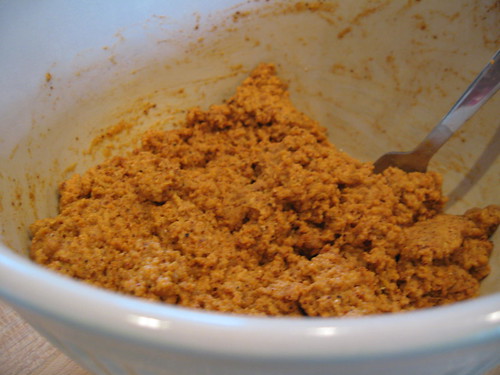
The mixed dough (no kneading necessary!)

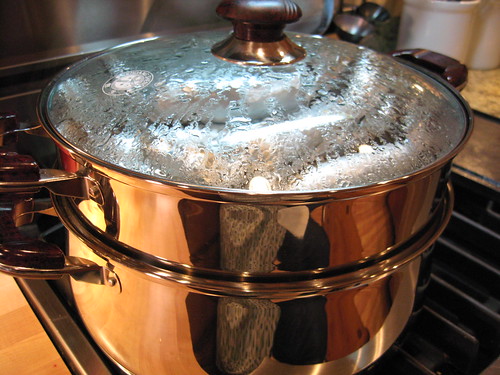
Steaming the sausages (that's right, no boiling or baking!). It really helps to do it in a large steamer, so you have a nice flat surface. This is one that I bought inexpensively at a little Asian market near our house. It also came with another steamer layer which can fit on top.

Now what are you waiting for? Get cooking!