Saturday, December 20, 2008

Go Dairy Free

If you haven't yet heard about this book, you've got to check it out. I was blown away with all of the fantastic information, recipes and resources that are listed between it's covers. The author is Alisa Fleming (from godairyfree.org), and she has definitely succeeded at publishing an amazing compilation of great recipes, from homemade non-dairy cheeses and milks to breakfasts, brunch, smoothies, drinks, dips, puddings, soups, side dishes, salads, sauces, breads and decadent desserts. I think all of the 225 recipes are vegan, with the exception of two (which give vegan substitutions).

In addition to all of the recipes (many contributed by vegan cookbook authors and bloggers such as Bryanna Clark Grogan, Hannah Kaminsky, The Urban Housewife, myself and many others), Alisa also shares detailed information on grocery shopping, calcium-rich foods, health, everyday living (from skincare to supplements) and allergy and vegan-friendly resources.

So if you're looking for a great book to give for the holidays, look no further. You can check it out on Amazon here.

Monday, December 15, 2008

A Fun Homemade Gift


I have always loved making homemade gifts, whether it be bottles of hot chili oil or biscotti or truffles. So I am always on the lookout for fun gift ideas, especially when they can be made out of ingredients from my pantry. Well, I've got a great new one for you. We had a special guest come and film a couple of segments for Everyday Dish. Janice Cox has written some fantastic books on homemade beauty treatments. Although her recipes aren't all plant-based, loads of them are such as her fizzy homemade bath bombs. You've got to give these babies a try! The fun part is that you can customize the scents, colors and shapes to suit your tastes (or those that will be receiving your handmade wares). Janice even said that her daughter shapes them into cupcakes, which you can garnish with sparkly sugar. The possibilities are endless! You can check out the video and recipe here.

(Brian's Puerto Rican Soup with annato oil drizzle)

We also have a new segment up for a Puerto Rican Soup by chef Brian Igarta. It's really good, and just the perfect thing to warm our cold bones this time of year. Oh, and that reminds me, check out this pic of my dog Bruno in the snow yesterday. It looks like this might be a cold winter, so hot fizzy baths and warm soups are just the thing to turn to.

This was Bruno waiting at our back door to be let in. He absolutely loves the snow!

Wednesday, December 3, 2008

Some Fun News

First up, I have an article in the December issue of Cooking Light Magazine. The piece is on cooking with mulling spices, as well as making your own spice blend. I actually wrote the article a few years ago (about 4, to be exact), so I was surprised to see it as I was flipping through the magazine last week. I glanced at the recipes and thought "boy, those look familiar". Well, no wonder! The recipes are all vegan, with the exception of the rice pudding, where soy or almond milk could easily be substituted.

For the really exciting news, check out the January issue of Vegetarian Times magazine. They included Everyday Dish as one of their Veg 25, hot list of fresh voices, ingenious products and handy resources that make vegetarian life more fulfilling every day. Yay! We're really excited to be included in VT list.

Sunday, November 30, 2008

A Big Tall Glass

Homemade soymilk. Oh yeah. I'm pretty excited to be making soymilk at home that's malty and delicious. Although I've always loved the idea of making it fresh at home and eliminating all that extra packaging waste (not to mention saving money), the flavor still eluded me. That is until I came up with this latest and greatest version. It's great for drinking or dunking or baking. It's just plain good stuff.

The recipe and video are up on Everyday Dish. I developed the recipe for my new filterless Soyquick machine, which I absolutely love. You can use a higher ratio of soybeans in it, which makes a creamier and richer soymilk. If you don't have a soymilk machine, you might want to add this one to your holiday list. It's awesome and makes fresh soymilk for pennies.

I plan to get working on tofu next. Oh, how I love fresh silky tofu!

I hope all of the Americans had an awesome Thanksgiving!

Julie

Sunday, November 23, 2008

Vegan Thanksgiving Roast

If you're looking for a vegan turkey roast recipe, there's a great new video, with chef Brian McCarthy, up on Everyday Dish. Go check it out!

In other news, I've finally perfected my soymilk recipe. It's so good! And yes, you will want to drink it straight from the glass. Rather than just share the recipe with you, we thought it would be fun to film it too. We're hoping to have the video up tomorrow (I know, 3 videos in a week!). I'll give you a heads-up once it's posted.

Happy Sunday!

Julie

Thursday, November 20, 2008

Pie Oh My

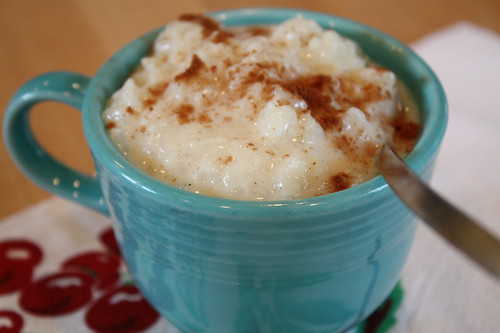
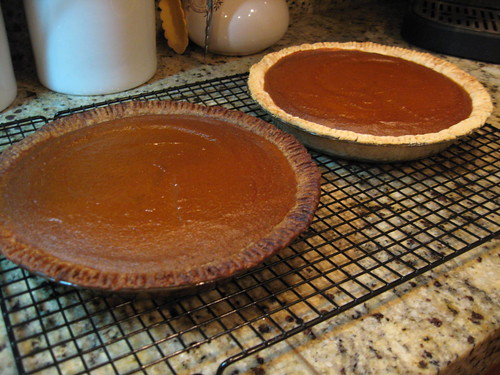
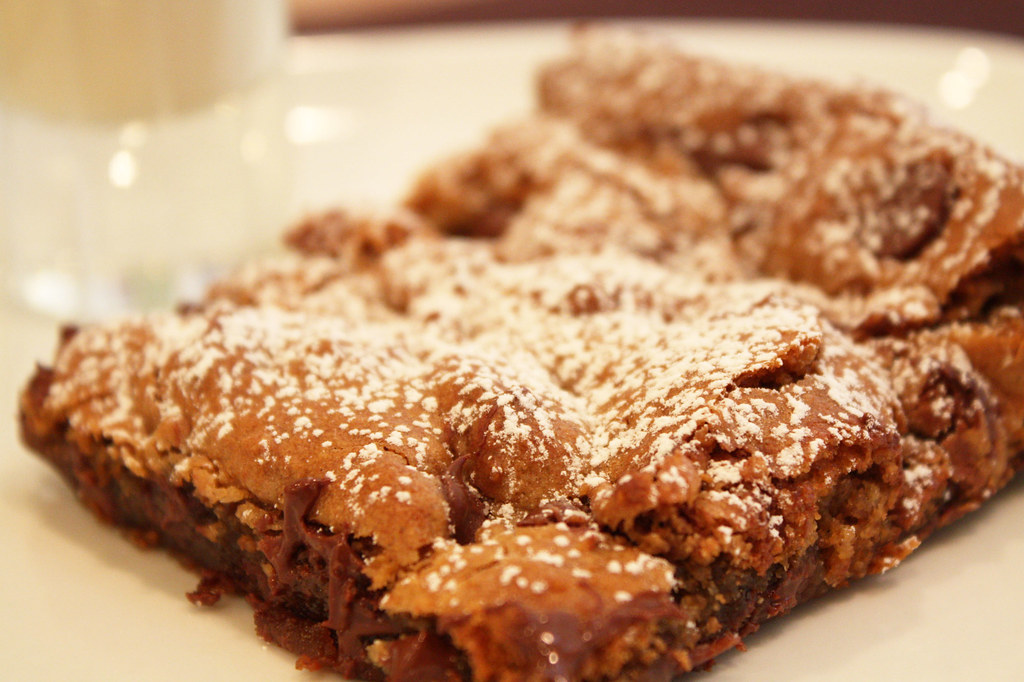
I promised a couple dessert recipes, and I'm ready to deliver. These are a few of my favorites from my new book, The Complete Book Of Pies, and the same ones that will be gracing my table on Thanksgiving day. Don't forget a scoop of vegan ice cream, to top off your homemade pies.

Brown Sugar Apple Pie with Almond Crumb Topping
Preheat oven to 400°F (200°C)
9-inch (23 cm) glass pie plate, greased
Rimmed baking sheet
Serves 8

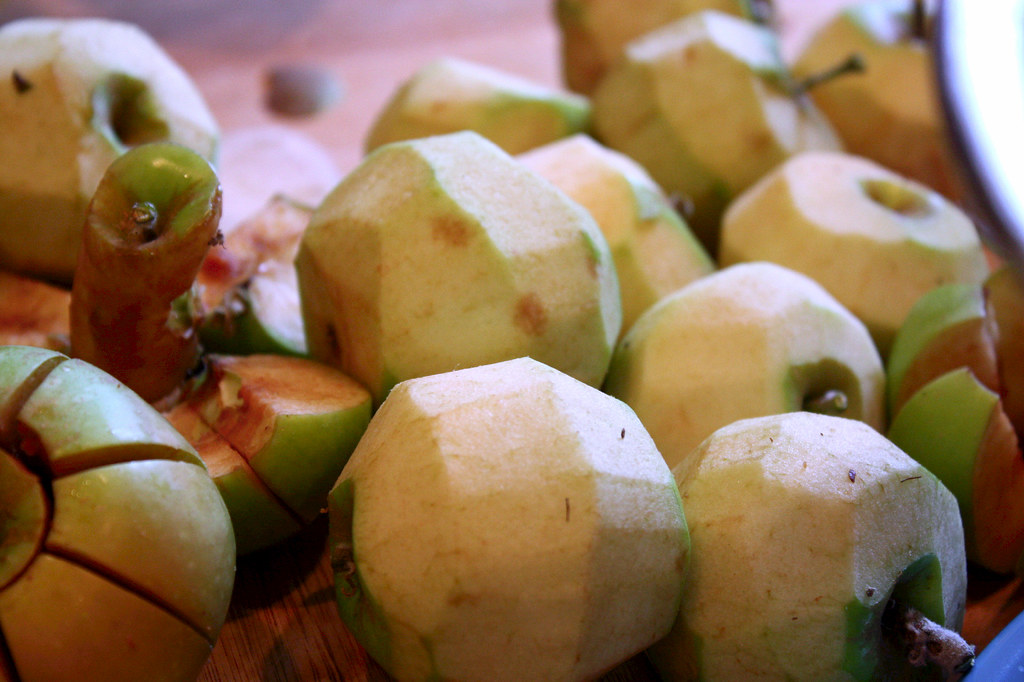
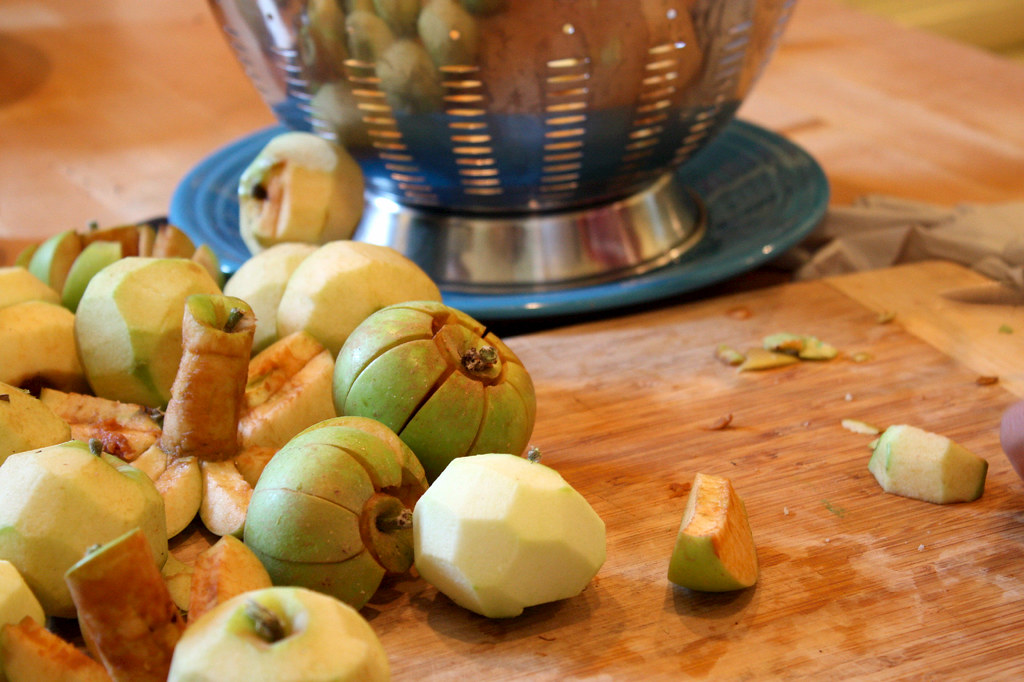
4 large Granny Smith apples, peeled, cored and thinly sliced
3/4 cup packed light brown sugar
2 tbsp all-purpose flour
2 tsp grated lemon zest
1 tbsp freshly squeezed lemon juice
1 tsp ground cinnamon
1 Prepared frozen pie shell (don’t thaw), or homemade -look for organic vegan shells like Wholly Wholesome
1 recipe Almond Crumb Topping

1. Filling: In a large bowl, gently combine apples, brown sugar, flour, lemon zest, lemon juice and cinnamon, making sure apples are well coated. Transfer filling to frozen pie shell, gently pressing apples into pastry with your hand. Place pie plate on baking sheet and bake in preheated oven for 30 minutes.
2. Remove from oven, reduce temperature to 350°F (180°C) and sprinkle crumb topping over apples. Return pie to oven and continue baking for 25 to 30 minutes or until the crumb topping is nicely browned. If pie starts to get too brown before it's finished baking, cover loosely with a piece of tented foil. Let cool on a wire rack for 1 hour before serving.

Almond Crumb Topping
3/4 cup all-purpose flour
2/3 cup granulated sugar
1/4 cup Earth Balance, melted
1 tsp pure almond extract
1/3 cup sliced almonds

1. In a small bowl, combine flour and sugar. Add butter and almond extract, stirring until incorporated. Using your fingertips, finish working butter into flour mixture, squeezing until a nice crumbly mixture forms.
2. Stir in almonds. Sprinkle topping over prepared pie or crisp according to recipe.

Bumbleberry Crumb Pie
Preheat oven to 400°F (200°C)
9-inch (23 cm) glass pie plate, greased
Rimmed baking sheet
Serves 8

4-1/2 cups unsweetened frozen mixed berries, such as blueberries, raspberries and blackberries, partially thawed
3/4 cup granulated sugar
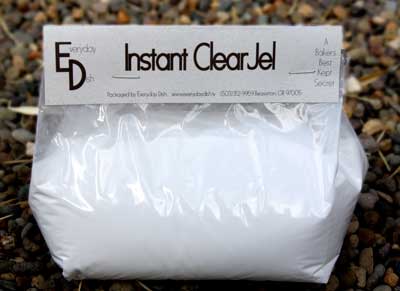
1/4 cup cornstarch
1 tbsp freshly squeezed lemon juice
1 Prepared frozen pie shell (don’t thaw), or homemade -look for organic vegan shells like Wholly Wholesome
1 recipe Brown Sugar Streusel or Almond Crumb Topping

1. In a large bowl, gently combine berries, sugar, cornstarch and lemon juice, making sure that cornstarch is not lumpy. Transfer filling to prepared pastry. Place pie plate on baking sheet and bake in preheated oven for 45 minutes.
2. Remove from oven, reduce temperature to 350°F (180°C) and sprinkle streusel over pie, avoiding juicy edge. Return pie to oven and continue baking for 15 to 25 minutes more or until top is puffed and nicely browned and juices are bubbling and thickened around edge. If pie starts to get too brown before it’s finished baking, cover loosely with a piece of tented foil. Let cool on a wire rack for 1 hour before serving.

Tips: If you like your pie a little sweeter, you can increase the sugar in the recipe by up to 1/4 cup (50 mL).
Variation: Substitute 1 tbsp (15 mL) raspberry-flavored liqueur for the lemon juice.

Brown Sugar Streusel
1-1/2 cups all-purpose flour
3/4 cup packed light brown sugar
1/2 cup Earth Balance, softened

1. In a small bowl, combine flour and sugar. Add butter and, using an electric mixer, a fork or a pastry blender, mix into flour until little bits of butter remain. Using your fingertips, finish working butter into flour mixture, squeezing until a nice crumbly mixture forms.
2. Sprinkle mixture over pie or crisp according to recipe

Tip: This recipe can be doubled.
Variations: Add 1 tsp (5 mL) ground cinnamon for a spiced version.

Recipes adapted from THE COMPLETE BOOK OF PIES, by Julie Hasson, 2008, Robert Rose, Inc.
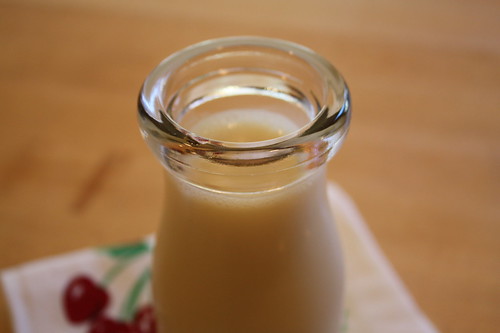
Monday, November 17, 2008

Thinking About Thanksgiving


As crazy as I am about cranberries, I'm even crazier for Thanksgiving! The cranberries, yams, gravy, stuffing, roasted vegetables, pies... It's just all good!

We almost always host the holiday at our house. A tradition that we started back when my husband and I were first married (*cough* 19 years ago). Needless to say, we've developed some traditional dishes over the years, and the whole family anxiously awaits their arrival every Thanksgiving. Of course we don't have a turkey, but no one ever seems to complain. They know that it's just how we roll with the holiday at our house.

There are a few recipes that I use for Thanksgiving, and the rest I just cook off the cuff. I thought I would share a few of my favorites, for those of you cooking next week.

Let's start with soup. There's a fabulous new recipe up on Everyday Dish for Pumpkin Soup. The recipe is from Barb Faulke and uses hazelnut butter. It would be a fabulous addition to any Thanksgiving feast. Next is cranberry sauce. My 2 favorites are my Cranberry Merlot Sauce and Spiced Cranberry Pineapple Sauce. For gravy, my favorite is Bryanna's Rich Brown Gravy from the Everyday Dish DVD. We've nicknamed it crack gravy around our house, because it's so addicting (and delicious!). I triple this recipe for the holiday. If you're looking for a seitan roast, we should have a new segment up by Friday with just such a recipe (from Chef Brian McCarthy). Um, lets see what else. Oh, mashed potatoes. My new favorite recipe is to take small red potatoes and boil them until tender. Drain, and smash with a potato masher. Add Earth Balance, salt, white and black pepper to taste and plain soymilk (preferably unsweetened). Minced garlic and fresh parsley are good too. Sometimes I'll sprinkle in a little nutritional yeast for added flavor. So good! Make sure to have lots of yummy gravy on the side.

Next up, yams. Most years I make a sweet spiced yam and apple casserole. I bake a bunch of yams until tender. Let cool, peel and cut into thick slices. Layer the yams in a baking dish, along with sauteed apples (which have been thinly sliced and sauteed in apple cider with a touch of brown sugar until tender). Sprinkle with ground cinnamon, ground allspice and a little freshly grated nutmeg if desired. I then top the apples and yams with a syrup (apple cider, brown sugar or maple syrup and a little cinnamon, simmered until slightly syrupy, maybe 10 minutes or so). Sometimes I add a splash of bourbon and a few crumbled ginger snaps on top too. Cover casserole with foil and bake, basting yams with syrup from bottom of dish, for about an hour or until it's all bubbly and delicious. This is like dessert!

Spiced apple and yam casserole, unbaked

For stuffing, I make it the way my mom always did (before I took over the holiday). Take a package of herb-seasoned dry stuffing (make sure it's vegan) or cubed rustic bread, and combine with veggie broth, dried sage, dried cranberries, chopped apple and lots of sauteed celery and onions. Add salt and pepper to taste. Some years I make this with cornbread instead of the rustic bread and it's great too. Just make sure to let the cornbread sit out uncovered to dry it out.

Whew, that's a lot of food. If you're looking for some fresh veggies, a nice crisp salad is always nice, especially tossed with dried cranberries and hazelnuts or chopped persimmon or pomegranite seeds...) and a simple homemade vinaigrette. Man, I'm full just thinking about all this food.

I think the only part of the meal that I haven't addressed is dessert. I will post some dessert ideas in the next couple of days, along with some recipes.

So what are some of your favorite dishes for the holiday?

Thursday, November 13, 2008

Cranberry Craze

I don't know if I've mentioned it before, but I absolutely adore cranberries. I love the tart flavor and crimson color that they bring to whatever dish they're added to. Lots of cranberry love happening here!

So, in the spirit of Fall and all things cranberries, I set out to develop a new cranberry sauce recipe. I usually always make the one on Everyday Dish (click on the link to get the recipe), but change is good too. This new sauce has crushed pineapple in it, which lends a great texture and lightens up the cranberry flavor just a bit. I also added ground cinnamon, which goes really well with the pineapple and cranberry flavors. So, without further adieu, I present you with my newest cranberry sauce...

Julie's Spiced Cranberry Pineapple Sauce
1 1/4 cups sugar (add another tablespoon of sugar if you like it a touch sweeter and a little less tart)
1/2 cup orange juice
1/2 cup water
3 cups fresh or frozen cranberries
2 8-oz cans crushed pineapple (in juice), undrained
1 1/4 tsp ground cinnamon

In a large saucepan, combine sugar, orange juice and water, stirring well. Bring mixture to a simmer, stirring as needed to dissolve sugar. Add cranberries, pineapple (and juice) and cinnamon, and bring to a simmer. Reduce heat slightly, and simmer, stirring occasionally, about 5 to 7 minutes, or until cranberries have popped and sauce has thickened up.

This makes a lot of cranberry sauce, but will keep well in the refrigerator, and can probably even be frozen. Try it on a seitan sandwich or stirred into plain soy yogurt or heck, it's even delicious mixed with shredded carrots and eaten as a salad.

So, what's your favorite way to eat cranberries?

Monday, November 10, 2008

Pumpkin Biscotti

Katie, from the famous Sweetpea Bakery, was in our kitchen recently to film her awesome and delicious Pumpkin Biscotti recipe. Although this is a great pic of Katie, those are definitely not biscotti she's holding up. Can you believe I forgot to take a picture of the biscotti? Oh well, at least you get a teaser of what she'll be making next on Everyday Dish (any guesses?). Now, as soon as you're done reading this post, you should head over to Everyday Dish and check out Katie's video and awesome recipe for pumpkin biscotti.

Wednesday, November 5, 2008

Making Sauce


A couple of weeks ago, my husband and I were wandering around the farmer's market, and happened upon an amazing deal. $20 for a huge case of organic tomatoes, which I think weighed close to 30 pounds. We were so excited to fill our freezer.

We decided to start with tomato puree. Fortunately we had a nifty tomato press/gadget tucked away in the cabinet, because this helped make quick work of removing the skin and seeds. We then froze all of the beautiful puree, and wondered what to do with the huge amount of seeds and skin that were left. Jay had the brilliant idea to run it through the Vitamix, and it worked like a dream! The Vita Mix produced a lovely sauce out of the skins and seeds, which didn't have a trace of bitterness, only a lovely sweet flavor. We dumped the puree into a giant pot, added some seasonings (garlic, oregano, basil, garlic and a touch of agave), and cooked it down for about 4 hours. What was left was some of the best tomato sauce I've ever had. To think that the sauce was made out of throwaway stuff was unbelievable! We then froze all of the tomato sauce in freezer bags and called it a day.

Here's some pics from our adventure:


Some of the seeds and skins, waiting to be pureed.

This is what happens if you don't have your lid on tight. The tomato puree went everywhere!

Monday, November 3, 2008

Chocolate Chip Coconut Cookies

This is a great recipe from Sarah Kramer, and the recipe and video are now up on everyday dish. Go check it out! I didn't get a good shot of the cookies, because there was a we-little mishap taking them out of the oven (which is why Sarah is making a sad face). But both Sarah and the cookies rock, and I want to send Sarah a million thanks for taking time out of her crazy travel schedule to come film with us! We had a blast in the kitchen and Sarah is super fun to work with.

Sunday, October 26, 2008

Tropical Ice Cream

If you love creamy tropical flavors, check out the newest recipe/video on Everyday Dish. The ice cream is super simple to make, using only 3 ingredients. It's a definite crowd pleaser, and just in time for the cooler Fall weather ; ) Actually, it's great anytime, because ice cream is a year-round treat, right!? Now, go get those ice cream makers churning!!

Tuesday, October 21, 2008

Great Quick Dinner

I have a ton of cookbooks (probably close to 500 or so, I Know!), and although I love reading them, I tend to cook off the cuff most nights (a pinch of this, a pinch of that...). But recently I made a pact with myself to try some new recipes from these awesome books.

What you see above, was a recipe that I tried the other night. The book is Tofu Cookery, 25th Anniversary Edition by Louise Hagler. I adapted the recipe for Chinese Sweet-And-Sour-Balls, adding garlic, fresh ginger and sriracha sauce. I also omitted the sauce, because I wanted to dip the tofu balls in hoisin sauce. Next time I'll try the sweet and sour sauce. These were delicious! My family gobbled them up, and asked me to make them more often. Yum!

I'm not going to post the recipe, because I'm not sure about copyrights with the book. But if you have this book, or have thought about getting it, this is an awesome recipe. Although they were round like small meatballs, they had a very different texture.They were delicate, with a great flavor and unusual at the same time. The sauce that we dipped them in was a mix of hoisin and sriracha sauces.

Unfortunately I didn't get a pic of the finished dish, as everyone dug into them so quickly they dissapeared. The picture above is what they looked like before being baked. Cute, aren't they?

On a different note, I put up a review of some awesome new ice cream on Everyday Dish. Go check it out!

Friday, October 17, 2008

I'm Back

Sorry for the little absence there. My computer was in the shop getting fixed again, but it's fixed and I'm back!

Last weekend, we took a little field trip to the Willamette Valley to visit Freddy Guy's hazelnut farm. It was harvest time, which was great fun to see. Now I can attest to just how fresh their hazelnuts are. We will have Barb (from Freddy Guy's Hazelnuts) on Everyday Dish, cooking up some delicious hazelnut recipes, including their famous chocolate hazelnut spread (can you say vegan Nutella?!). Oh wait, the hazelnut butter segment is up now, so don't miss it!

Here's a few pics from the day...


Tuesday, October 7, 2008

Busy Baking

I really had the best of intentions with Veganmofo. But, it seems, work just keeps pulling me away from my computer. Not to worry though, I will still be posting, just probably not a daily mofo.

Now, guess who's going to be on Everyday Dish? The one and only Sarah Kramer. Sarah was passing through Portland on tour for her new book, Vegan A Go Go, and took a little detour in our kitchen. We filmed two great segments, which I can't wait to share. Can I just say that Sarah is awesome?!

Oh, and before I forget, we have a new segment up on Everyday Dish. It's Hannah Kaminsky and her amazing butterscotch blondies. Go check it out and make those blondies. They are fantastic!

Friday, October 3, 2008

Agedashi Tofu


Agedashi Tofu is an utterly delicious dish. It's a favorite in our house, and a fun dish to serve to people that think they don't like tofu. Believe it or not, it's easy to prepare, even on busy weeknights. The trick is to drain and lightly press your tofu, to remove any extra moisture. The tofu is coated with potato starch and then fried. The sauce quickly cooks while you're frying the tofu. It can easily fit into a 30 minute time frame, especially if you have someone helping you (my kids love to help when I'm making this dish). A simple cucumber salad (sliced cukes, rice wine vinegar and a splash of soy sauce or tamari) and some steamed brown rice round out the meal. Actually a rice cooker really helps out here too, because it cooks the rice without any work on your part. I do love my appliances!

Rather than type out the recipe, you can print it right off Everyday Dish, and watch the video too. I highly recommend that you try it out. It's so, so good!

I'll be back on Monday with another veganmofo post.

Have a great weekend!

XO Julie

Thursday, October 2, 2008

Dinner


On crazy, busy nights, it's always such a huge relief when I don't have to spend a lot of time making dinner. As much as I love to cook (and I really love to cook), some night's you just want to get dinner on the table in 15 minutes (although it rarely happens that fast in my house). But, I am happy to say, this dinner is one of those exceptions.

I like to cook up a big batch of garbanzo beans in the pressure cooker once a week, so I always have them on hand and don't have to rely on canned beans. Then, they're ready to go in the fridge (or freezer), for quick dinners or lunches on the run. So, late yesterday afternoon when I started wondering what I was going to make for dinner, hummus came to mind. I pulled some pitas from the freezer, cut up some fresh veggies, pickled onions and some olives and voila...dinner was made. Man, not only was it quick to throw together, but delicious and hearty too. And talk about economical... The best part, my kids loved it. So much so that they packed themselves the leftovers for their school lunches.

Now, the big question is, what am I going to make for dinner tonight?

Wednesday, October 1, 2008

Breakfast


Can you believe that it's Veganmofo (vegan month of food) time again? I'm going into it with the best of intentions. I mean really, how hard can it be to post everyday, right? Well, I'm always up for a good challenge, and I sure enjoyed reading all of those fabulous Veganmofo posts last year. So I will give it my all, and try and post as often as I can.

Now, onto the food...

Lately, I've been trying to incorporate as many whole grains into my cooking (and diet) as I can. I've found that a really easy place to start is breakfast. Nothing beats starting the day with a bowl of homemade granola, and it couldn't be simpler to make. You can find my recipe here, along with a video. Feel free to customize the recipe to your liking, with more nuts and fruit, or hemp seeds, or other spice combinations. You really can't go wrong. And, if you're not a cereal and milk person, it's great sprinkled on top of yogurt or fresh fruit. If you want to make a gluten-free version, make sure to buy gluten free oats and omit the wheat germ. Easy peasy.

On another note, if you live in the Portland, Oregon area and are interested in taking the Cancer Project classes, let me know. I have a series of classes starting next Wednesday, and there's room for a few people if you're interested. The Cancer Project is an incredible organization, and you can read more about them here. I am a Cancer Project instructor, and teach the classes in the Portland area. Send me an email if you're interested at blog@everydaydish.tv. And, just in case you're wondering, the food in the Cancer Project classes is all plant-based and vegan. Not to mention delicious too!

Tuesday, September 30, 2008

Grand Opening!!

I interrupt this post to bring you an important announcement. The Everyday Dish site has been beautifully redesigned with all kinds of wonderful features, and is making it's debut launch today. Yay!! We are so excited about it, and hope that you enjoy it as much as we do. Go check it out!

In other news, there's also a rice pudding video up on the new site, which is really good. You've got to go make yourself a pot ASAP! I use hemp milk for the video, but any non-dairy milk will work too. I have to say though, that I really like the creamy taste of Living Harvest hemp milk or soymilk in this recipe.

Oh, I forgot to add that we also have a new blog on the Everyday Dish site. The blog is called "Dish", and it's where I get to highlight cool vegan products, from food to cookware to makeup and shoes. If you've got the lowdown on something awesome that I've just got to highlight, let me know. I'm always on the lookout for new fun products.

Now go check out the site!

Wednesday, September 24, 2008

Homemade Kosher-Style Dill Pickles

As you can probably tell by now, I love making food from scratch. It's usually fairly easy to prepare, can be customized to your palate and tastes, and is better than anything you could buy at a store. I like to think of homemade food as the ultimate in Artisan craft.

So what's my latest project you ask? Pickles. My love of pickles goes way back to childhood, to the awesome bowls of sour dills that would grace the table at our local deli. I loved the crunch of these freshly pickled cukes, the salty yet lightly sour taste. These pickles bared no resemblance to the softer, vinegar-flavored pickles found in grocery stores. These were the real deal, true deli-style salt-brined Kosher dill pickles. It took me a long time to find a recipe that fit this bill. I am happy to say though that it was not in vain.

In the early 1990's a modern, hip-style deli opened in Santa Monica, California. The concept of the Broadway Deli was Jewish deli meets hip eatery. They had lots of inspired dishes on their menu, artisan breads and great desserts. In 1994, they came out with a cookbook, and right there in it's pages was the recipe that I had been searching for: true, salt-brined Kosher dills.

I don't think that the cookbook is any longer in print, so I'm going to post the recipe here. Feel free to add green tomatoes, lots of extra garlic and even dried or fresh chili peppers. I hope that you enjoy them as much as I do. They're really quick and easy to make, and can be stored in your fridge for quite a while. Plus, you should be able to find pickling cukes at your local farmer's market right now. If you have lots of green tomatoes on your tomato vines, which won't have a chance to ripen before the cooler Fall weather rolls in, this is a perfect thing to do with them.

Broadway Deli's Quick Dill Pickles
(makes 10 to 12 pickles)

These pickles taste just like the one's grandma used to make, only they're faster and easier to prepare. To transform bumpy little cucumbers into crisp, garlicky dill pickles, place all of the ingredients in a jar, cover, and shake. In four days you'll have the best dill pickles you've ever tasted.

4 quarts boiling water, for cleansing jar
3 tablespoons pickling spices
6 cloves garlic
10 to 12 firm, small pickling cucumbers (about 1 1/2 pounds)
1/4 cup Kosher salt (preferably Morton's brand, which is saltier than others)
1 bunch fresh dill

1. Pour boiling water into a 1-gallon canning jar and pour out. Drop pickling spices and 3 of the garlic cloves into the bottom of the jar. Arrange cucumbers in the jar to fill just up to the neck. Top with salt, remaining 3 garlic cloves, and dill. Add cold water to cover. Cover securely with the lid. Shake well and let stand for 3 to 4 days in a cool, dark place before serving.
2. Refrigerate after 4 days to stop the pickling process. The pickles will keep for several weeks, covered, in the refrigerator.

Variation: Replace cucumbers with green tomatoes.

Recipe adapted from Judy Zeidler's International Deli Cookbook; Great Recipes From The Broadway Deli, by Judy Zeidler, Chronicle Books, 1994

P.S. If you're wondering why there is a plate in my pickle jar (in the photo), it's because I doubled the recipe and topped the cukes with a plate. This helps to keep the pickles submerged in the brine.

Tuesday, September 16, 2008

Gluten Free Cookie Bars

I've been wanting to try gluten-free baking for a while now, but I just wasn't sure where to start. Thanks to a good friend recently, I was able to dive right in.

This friend was trying out a gluten-free diet (per doctor's orders), and was having the worst craving for chocolate chip cookies. I could feel her pain, and knew I had to help her out. I ran home, did a little internet research, and found a recipe for cookie bars. Fortunately I had a bag of gluten free all-purpose baking flour from Bob's Red Mill already in my pantry, so I was ready to go. I adapted the original recipe based on what I had on hand, but I've gotta say that this is one of my favorite cookie bars ever! Gluten free or not! So, a giant thank you to Karina Allrich for sharing your gluten free cookie recipe. You can bet that I'll be doing a lot more gluten free baking in the future.

I decided that this recipe was so good, we had to get it filmed and up on Everyday Dish (with my adaptions, of course) ASAP. The video can be seen here, and the recipe here. For Karina's original recipe, you can find it here at her website. Her site is not vegetarian, although there are quite a few vegan recipes.

As for me, I am thinking about making a gluten-free pumpkin cake next. Hmmm, or maybe an apple spice cake. Now that I have the gluten free flour on hand, anything is possible.

Thursday, September 11, 2008

I wanted to let you know that there's a new recipe & video up on Everyday Dish, for Blue Willow pasta. The recipe is from the chef at Jam On Hawthorne (in Portland, Oregon), and is really good! It includes a yummy recipe for a tofu marinade, that would work well for a variety of tofu dishes. This reminds me that I should marinate some tofu for quick weeknight meals.

Also, there was a really good question about the cracker recipe and I thought I would answer it here. The question was about baking crackers on a Silpat. I tried baking the crackers on both parchment and Silpat mats. I prefered the Silpat mat. The crackers came out crispier (and thus better) on the Silpat. This is not always the case for every recipe, but the mat won out here.

I'm hooked on the homemade crackers! I plan to do lots more experimenting with other flavor combos. I love the idea of using different flours, seeds and spices. Homemade snacks are the best! Thanks for all the awesome comments on the recipe.

Thursday, September 4, 2008

Crackers

I have a new favorite obsession. Homemade crackers. It really started just the other day. My kids were asking me to buy them snacky food that they could take in their school lunches. I just couldn't do it. One, because I get tired of all the junky ingredients in a lot of those snacks. The other reason is that I have a ton of whole grain flours that are screaming to be used (and hey, I could save money at the same time). So rather than head out to the store, I headed to the kitchen and started making crackers.

The crackers are so incredibly easy to make, almost easier than making cookies. They also contain healthy ingredients, most of which we all have sitting in our pantries. And the best part? My kids absolutely loved them! They polished them off and asked for more. Being the sneaky mom that I am, I said I would show them how to make them. That way, when the craving hits, they might actually try and bake themselves up a batch. Well, you never know.

Feel free to play around with the flours or seasonings. I did find that my kids preferred the crackers when I used half all-purpose flour and half white whole wheat. I also discovered that they not only baked better on a Silpat (silicone pan liner), but they practically flew off the baking sheet. If you have one of those nifty pastry wheeler/cutter, it works really well for gently cutting the crackers into squares. Otherwise you can just roll the dough out thinly in the pan, bake, and then break into pieces when cool.

Here's the recipe for those of you who would like to try your hand at homemade crackers. I promise you it's painless and fun! It's also a perfect project to do with young kids or on a rainy day. Once you go homemade you'll never go back.

Julie's Rosemary Garlic Crackers
1 cup all-purpose flour
1 cup white whole wheat or whole wheat pastry flour
2 tbsp nutritional yeast
1 tsp baking powder
2 tsp dried rosemary
1 tsp granulated garlic
3/4 tsp fine sea salt
1/4 tsp ground pepper, optional (but good!)
1/2 cup water
3 tbsp extra virgin olive oil
Coarse sea salt crystals, optional

1. Preheat oven to 400°F.
2. In a bowl, mix together the flours, nutritional yeast flakes, baking powder, rosemary, garlic, salt and pepper. Add the water and oil, stirring until dough comes together. If dough is too dry to mix, add another tablespoon of water or as needed. Divide dough in half.
3. Roll the dough out very thin. If you have a small little rolling pin, simply roll the dough right out in your pan. Transfer the dough to a Silpat or parchment-lined baking sheet. Score the dough into squares so that it's cut, but not separated into pieces. If desired, sprinkle a little coarse salt over the tops of the crackers and lightly press into dough with the rolling pin. Repeat with second piece of dough.
4. Bake crackers in preheated oven for 15 minutes, or until golden and crackers look crisp. Let crackers cool in pan before removing. They will crisp up as they cool. If crackers are still a little soft, place bake in oven and bake for another five or so minutes until crisp.

Copyright © 2008 Julie Hasson


Here's some pics of the cracker-making process.

Dough

Rolled dough in pan

Scored/cut cracker dough, ready for baking
(with the pastry wheel/cutter)

Baked and cooled crackers. You can kind of sea the little salt crystals on the tops.

Thursday, August 28, 2008

Blackberry Soda

There is nothing like the fresh flavor of homemade soda! We usually have a pretty big stash of frozen berries, and the berry syrup to make this soda is easy-peasy - just the ticket on a hot summer day. You could also use the syrup for pancakes, waffles or homemade snow cones. The recipe and video are up on Everyday Dish. Feel free to substitute another berry for the blackberries, depending on what you have.

If you're into bubbly water or homemade soda, check out this toy. I love it, love that you can reuse the bottles so they don't wind up in landfills, and that it works out to 18 cents a liter. Not bad, and so much fun!

Anyways, check out the recipe for a fun and delicious treat.

Monday, August 25, 2008

Instant Clearjel

It's here! My new favorite thickener for cooking. I love this stuff, because unlike cornstarch, arrowroot or tapioca starch, you don't have to cook it. It's instant! When it comes to thickening puddings, sauces, making vegan cheeze, ice cream, homemade vegan mayo, freezer jam, soy yogurt and a million other things, this stuff is the bomb baby. Really. I've also heard that you can add 1 tsp. ICJ per cup of flour to cookie batters, resulting in softer, chewier and thicker, bakery-style cookies.

We've added it to the marketplace on the Everyday Dish site. The link is here. We'll hopefully be adding a few more, hard-to-find (yet-o-so-cool) ingredients soon. I've also been working on recipes using the Instant Clearjel, which we'll be filming shortly. That way you'll have an aresnal of recipes, and wonder how you ever lived without this stuff.

Thursday, August 21, 2008

Apples

What to do when the neighbor's trees are overflowing with apples? Make applesauce! I am a fruit picking fiend, and go completely crazy when someone offers me fresh fruit off their trees.

After the blackberry upset last week (the owner of the property next door to us cut down all of our shared blackberry vines, just as thousands of gorgeous, wild organic blackberries were ready for picking). I begged and pleated, as he sat atop a rented backhoe, explaining that it was already done (why he waited until they were ripe for the picking, I'll never know). So the blackberry jam and scones and cakes and pies that I had been planning, were definitely not going to happen. I needed a new plan. A new fruit. Something else that was ripe and ready for picking.

The answer was actually much closer than I imagined. The man siting on top of the backhoe, feeling a little sorry for my berry loss, suggested that I come and pick apples from his yard which were ready for picking. I was so taken with the ripe, juicy blackberries that I hadn't even noticed all of his apple trees, hanging low with fruit. Perfect, tiny little apples.

I quickly grabbed my husband and some buckets and we went apple picking. I'm not sure how many pounds we picked, but let's just say that there were many. I couldn't stop picking. And so, that was how we spent our evening. Picking, peeling, chopping and cooking. And, let me just say, that it was some of the best applesauce I've ever had.

Although I don't have an exact recipe to share, it was easy-peasy to make. We filled the pressure cooker two thirds of the way full with chopped, peeled apples. I added a bit of apple cider and some ground cinnamon and allspice to the mix. I cooked it under high pressure for 5 minutes (yes, only 5 minutes!), and let the pressure release naturally. These happened to be very, very tart apples, so I also added a little brown sugar to taste, a little more spice and that was it! If you don't have a pressure cooker, you can cook it in a regular pot, although it will take quite a bit longer. You can also make it in a slow cooker, and let it go overnight until the apples are nice and soft.

Here's a few pics from our applesauce adventure:


I'd better pick more apples soon, because I think apple pies are on the menu next.

Friday, August 15, 2008

Blackberry Cobbler

We have a new episode of our Everyday Dish cooking show up, and this time it's blackberry cobbler. The recipe is super-simple to make and is perfect for fresh summer berries. Check out the video here.

The recipe for the cobbler is from my new pie book (The Complete Book Of Pies), which should be hitting book stores in the next few weeks. I love this recipe, which is a different style of cobbler. Instead of topping the fruit with biscuit dough, you fill your baking dish with a sweet batter, and top it with lots of fresh berries. When it bakes, the fruit falls to the bottom and the cake bakes up on top. What you get is a fabulous combo of pie and cake, all together in one dessert. It's really delicious, and can be thrown together in minutes (unless, of course, you have to pick the berries first).

Now, a little bit about my new book. This pie book was the longest and largest project I have done to date. Start to finish it was close to 3 years. That's a long time, and lots of things change in a three year period. When I started the book, I was vegetarian, not vegan, although I was certainly going in that direction. I just wasn't sure how I could be vegan while I was working on recipe projects that called for dairy and eggs. This was something that I struggled with for quite some time. What I eventually did was to finish the recipes which called for dairy and eggs first, and then develop all of the other recipes to be vegan (or vegan-friendly as they are titled in the book). This way I could be vegan and develop vegan recipes. It worked out to be a beautiful decision, and I have never looked back.

So, although the book is not vegan, it has 97 vegan-friendly recipes. The recipes are not only delicious, but pretty easy to make as well. I worked really hard to help demystify the art of pie making, and make it fun, easy and approachable. To say that I made hundreds of pies during the three years would be an understatement. I think the number may be closer to a thousand. I baked pies night and day for almost three years.

Now, here's the part that I'm hoping people will understand. My publisher decided that he wanted a few meat pie recipes in the book. I know! I really can't go into it too much, but regardless of my personal feelings on the matter (and I have many) there are 10 non-veg recipes in the book. The recipes came from another cookbook author, and were not written (or tested) by me. I really hope that everyone will understand that this was not my decision or choice, and not hold it against the book. I worked so hard on this book, and am really proud of it. I think that I accomplished what I set out to do, which is simplifying the process of pie making in a modern and fun way.

Life is definitely a journey, and it's exciting for me to be able to continue to work on the projects that are so close to my heart, like our Everyday Dish cooking show, The Cancer Project and now writing vegan cookbooks.

So, what are you waiting for? Get over to Everyday Dish and make that cobbler!!

Monday, August 11, 2008

Soymilk, Part 2

I've been playing around with soymilk recipes again, and had to share this one. It was really good! A combo of soaked soybeans, jasmine rice and rolled oats. A delicious and creamy milk!

One of the reasons that I've been experimenting is because I've been playing around with a fun new machine. It's the brand-new Soy Quick 930P, which has been redesigned without a filter cup. I love it! It's really easy to clean and makes fantastic non-dairy milks. This machine also makes exceptional rice and grain milks too. In fact, we love it so much, that we now carry it on the market page at Everyday Dish.

I'll keep experimenting, and if anyone is interested in a recipe I would be happy to share. It's so fun to be able to make healthy milks at home, for a fraction of the cost of store bought. Plus you can customize them any way you please, which is always a benefit in my book. I also love that there's no packaging to throw away. I simply re-fill my glass jars with the homemade milk and I'm ready to go.

I'd love to hear what everyone is cooking up in their kitchens this summer.

Julie